Sunday, August 18, 2013

Sunday Sketches and How I Draw Everywhere

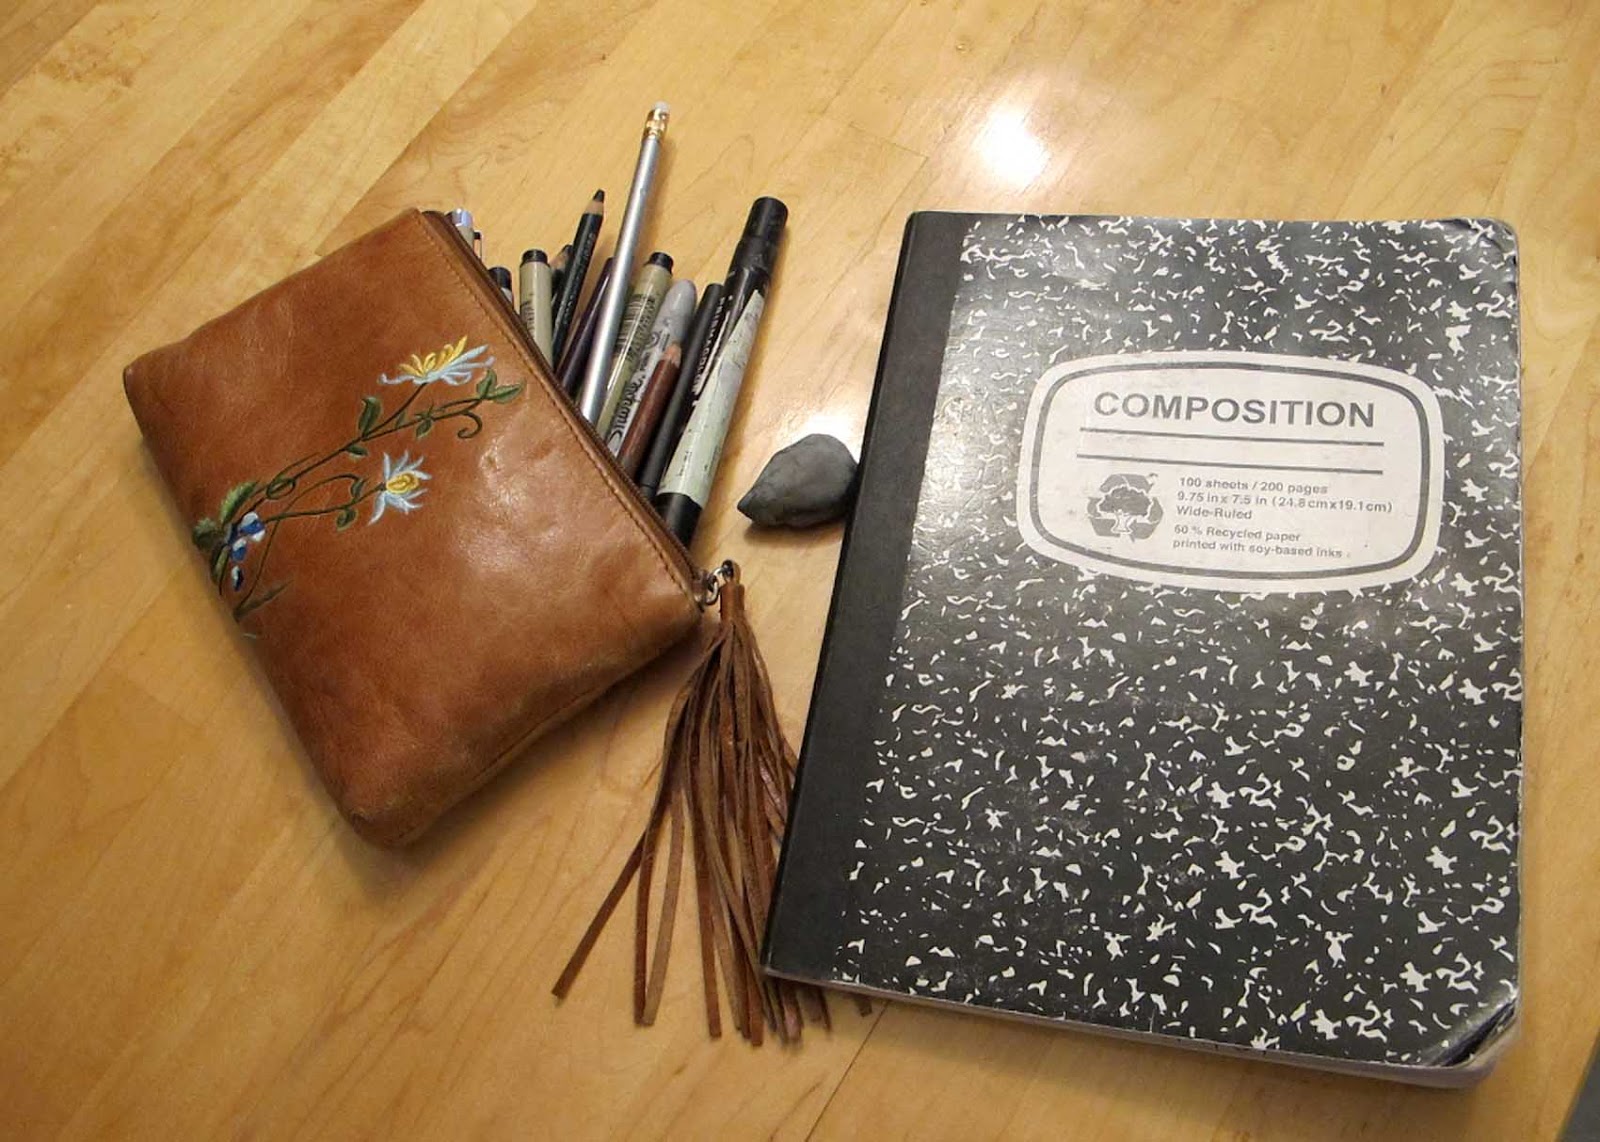
I like to carry some drawing materials with me wherever I go. I had to set aside my pretty, perfect aqua purse that I bought in Las Vegas because it wouldn't fit my composition book and pouch of pens and pencils. THAT'S how committed I am to taking this stuff with me! :)
I like to have a composition book or little notebook, several pencils and a tiny sharpener, a kneaded eraser, some felt tip pens and some random Prisma colored pencils and 1 or 2 Prisma markers. Most often I just use the felt tip (I prefer a Papermate Flair) but I like to have the other things available if I feel like adding some color.

What's in my composition book? I take notes in meetings I'm in, I write journal entries, I do drawings and basic doodling.

This page was done while watching "Liar, Liar"--a movie I've seen a bunch of times so only need to half pay attention. That way the other half of my attention can be on my lettering. Plus I like to keep my hands busy when watching a movie or TV (and better drawing than snacking, right??).
This simple composition book now acts as a great reference for lettering and it's also a great journal and record WITHOUT BEING A TRADITIONAL, FORMAL JOURNAL/DIARY! This is a win/win for me.

So here are my latest Sunday Sketches done in the ol' comp book:
 Still not sure if I'm going to add some color to her...

This took longer than I expected but was fun to do and is definitely something I want to work on some more. I'm thinking of adding a bit of color to this one too. 

Saturday, August 17, 2013

Newest Name Signs

 This one is for a friend's brand new beautiful baby.
And this one is for my daughter's sweet friend.

I went a little more funky with the lettering on these since they were gifts so I could do what I want. :) I sprinkled in some capital letters. I kind of like the different look.

Sunday, July 21, 2013

A Pirate...and some chocolate

My daughter has been performing in a wonderful production of the Pirates of Penzance in a local children's theater group. Their final performance was last night. I made this little drawing of a pirate to look after the treat we brought for their cast party.

(Original recipe for the pretzel treats came from Family Fun Magazine years ago, but can also be found HERE).

We used only red and brown M&M's because they seemed to fit a proper pirate color scheme (according to my daughter). The treats and the drawing were a hit. The play was a bring-down-the-house "wow that was completely amazing!" hit!

Thursday, July 18, 2013

A Gift for a Sweet Little Girl

My friend's daughter is getting baptized today so I thought she needed something pretty to commemorate her special day.

This is another one of my chipboard paintings (this one done on the backing to a notepad). The frame is a simple 5"x 7" wood frame that I sanded, painted a soft lilac color, and then distressed. I added the little ribbons as a fun accent to one side of the frame.
Molly's Baptism Flowers, 2013, 5" x 7", mixed media on chipboard

Newest Name Sign

A gift for a friend's newest little one.

Friday, June 14, 2013

Drawing People Summer Art Class - Day 5

Day 5 (our last day of class) - Putting it All Together

We did a really quick review of the steps we've been working on all week.
And then the kids got to work on their final drawing. They did this drawing in their sketchbooks. When they were finished we compared them to the drawings they did on Day 1. I love this part! It's so fun to see the pride and surprise on the kids' faces when they see their final drawing compared to their first drawing! I love it! They all want to get rid of their first drawings but I say KEEP IT. It's so fun to be able to compare and see the progress they've made.
Age 14

Age 13

Age 10

Age 11

Age 15

Age 14

I love that a lot of the kids stuck with the same basic age, hair style, and gender of the subjects of both drawings. This was done completely subconsciously since they haven't seen those first drawings since the first day. But that's sort of where the similarities ended. They all achieved wonderful realism and depth and emotion in their final drawings!

Then to kind of let our hair down and unwind at the end of our week together, we did some drawings on chipboard where we broke all the rules. (We used THIS METHOD that I discussed in an earlier post).


This was a GREAT group of kids and I thoroughly enjoyed spending this week with them!!

Take home assignment??
Practice, practice, practice. Drawing people is like doing anything else. It takes practice and the more you do it, the better you get!

Thursday, June 13, 2013

Drawing People Summer Art Class - Day 4

Day 4 - Light and Shadow

We've learned several ways already to improve our drawings of people. And today we are taking our drawings one step further by creating DEPTH with light and shadow.

Notice how each skill builds on to what we've already learned. First we learned where things go, then we learned what to put in those spaces where things go, now we'll learn how to create the lights and shadows on the features that go in the spaces. (I seriously love this process!!)

Our warm up exercise today was to begin a "Value" page in our sketchbooks. I had the kids each do their own value scale. I know there are tons out there that you can print, but I find that having them make their own really reinforces the concept and helps each artist to get a feel for the way they want to express dark and light values in their drawings.

I have them draw a long narrow rectangle on their page and divide it into 5 sections and label them 1-5. Section #1 is the highlight so we leave it blank and let the white of our paper be the highlight. Section #5 is our darkest value. Once you've filled in #5, fill in section #3 with a value right between #1 and #5. Then fill in #2 with a nice light value that's exactly between your #1 and #3. Then section #4 with a medium dark value that's right between your #3 and #5. I find that going in this order 1,5,3,2,4 is much more effective than going straight 1through 5.

Here's a sample of one of the students value scale:
We also talked a little about hatching and stippling. Notice her comment about stippling ("for crazy people")--yeah, I kind of agree. I just don't have the patience for that. :)

I then asked them to draw some circles on the page. Some as lightly as they could and some quite dark--trying for about a #5 on the value scale. I did this because I have some students that draw very lightly and need to be pushed to go darker and I have some that draw very darkly (dark? 'darkly' sounds weird) all the time and need to practice a lighter touch.

We looked closely at our trusty picture of Nicole Kidman and identified all the specific value areas.

And now onto the Head Template page to get some hands on practice:
On one of the faces we divided it up by value. We did this by using symbols for each value and this page can be used as a reference for future drawings. We talked about light source and we concentrated on three values--dark (a #5 on our value scale), medium ( a #3) and highlight (#1). And of course there's millions of values in between, but I find that breaking a drawing down into those 3 values at first is a great way to simplify and begin. Then you can go back in and add all the subtle in-betweens. (The middle part where you get to add in all the subtle value differences is my favorite part of a drawing!)

Recognizing values and value subtleties takes practice. That's why we approached this concept in a couple different ways.

Then on the other face on our template page we did what I call the Eraser Method. Here are the steps in photographs:


I love this method and use it on most of my pencil drawings of the face. It's a great way to get your light/medium value down quickly, efficiently, and evenly. Then it's just a matter of "drawing" the highlights with your eraser and then adding in your deep values and details.

I think the students were surprised at how great their faces looked! I like to take their drawings and hold them up a few feet away from the kids so they can see it from a bit of a distance and see just how much depth and realism they are creating.

Sometimes when you're so focused on your drawing, you forget to step back and appreciate it and look at it from a far. I also always encourage the kids to look around at everyone else's drawings too. I love to see them learn from each other!


No specific assignment for tonight. Just the usual...practice, practice, practice.

Tomorrow, our last day of class, we put everything together and do a final drawing and then compare that to our drawings from Day1. This is always very fun and rewarding! It's amazing to see how much they improve with just a week of instruction and some basic skills!!

Then if we have time, we'll do some funky faces and break all these rules we just learned. :)

Wednesday, June 12, 2013

Drawing People Summer Art Class - Day 3

Day 3 - The Facial Features

This is the process we've gone through so far:
1. As soon as students entered the class on Day 1 they drew a person. This drawing was set aside to be brought back out at the end of the course for comparison.
2. Basic introduction to drawing in general and to drawing people particularly.
3. We worked on placement -  where does everything go?
4. Okay, now we know where the eyes, nose and mouth go...let's draw some eyes, noses and mouths.

That is what we did today. Tomorrow we'll work on light and shadow and some final details and then on our last day, we'll put it all together. I think this is a great way to approach any drawing--break it down into accomplishable tasks, practice the parts, and then put it all together. (Good life advice too, right?)

Today we went back in our sketchbooks to the Eyes, Noses, and Mouths pages we made on the first day. I had some bowls set out on the table with features clipped from magazines. These were available to be used as a reference and also to be taped into sketchbooks if the students chose to do so.

Let's talk about drawing faces for a second:
A big part of drawing faces (or anything, really) is deciding what to draw and what to leave out. We talked about how people do have lines under their eyes and sometimes dark circles--but unless you're TRYING to make your subject look old and tired, leave out those unflattering features. Also, many things on the face are done with just a suggestion of a line or shadow--the bottom eyelid or side of the nose, for instance. They don't need a dark outline. In fact many times a dark outline can make your drawing look amateurish. It's also impossible to draw every strand of hair. Many times you just give the idea of the hair and add in some light and shadow and a few individual strands here and there.

Georgia O' Keefe once said, "Nothing is less real than realism. Details are confusing. It is only by selection, by elimination, by emphasis that we get at the real meaning of things."

We talked a lot about selection, elimination and emphasis today. The artist's job isn't just to draw it's to make decisions about what to add in and what to leave out.

We took each feature and drew them individually and even broke each of them down into smaller steps. This is a great way for, not just kids, but anyone to learn to draw. We found this handout to be VERY helpful:

We also went back to Nicole and talked specifically about her individual features.
She'll make one more appearance tomorrow to help us with light and shadow and then Ms. Kidman will be finished with our art class. Or should I say we'll be finished with her. 

And then we practiced, practiced, practiced.
 This young artist is AMAZING. Basically she could be teaching this class. The girl's got skillz!!
 I don't normally show the students their drawings from the first day again until the last day of class. But for this artist I just had to show it to her quickly so she could see just how much she's improved in just 3 days!
 This artist (who belongs to me) :) always complains about drawing eyes, but today she got a couple eyes drawn on her Eye page that she was really proud of. Ah, success!
 Wish I would have taken a picture of the finished drawing of this one. It was wonderful and so creative. Last minute she decided to add a little flair with a hat--this is my future fashion illustrator. She always adds something whimsical and creative to her drawings.
 I love that this artist not only added a reference picture to her sketchbook, but also wrote some notes around it. She is also always bold and brave enough to try her drawings in pen as well as pencil.
This artist much prefers anime, but he stepped out of his comfort zone today and ended up with some wonderful drawings...and then went back and drew some anime. :)

Optional Take Home Assignments:
1. Keep practicing eyes, noses, and mouths. And then put them together on your egg shape head we worked on yesterday. 
2. Keep gathering pictures for your Art File - specifically people and facial features

LinkWithin

Related Posts with Thumbnails